How to connect AiVikings MCP to ChatGPT
ChatGPT connector
Section titled “ChatGPT connector”Add AiVikings as a connector in ChatGPT and run domain registration flows by asking in plain language. No code. Useful for non-developers and for quick one-off registrations.
How to use
Section titled “How to use”- In ChatGPT, add the AiVikings connector and authorize it with your account.
- Ask in chat: “Find and register a domain for my project.”
- ChatGPT checks availability through AiVikings and runs the registration flow for you.
How to connect AiVikings MCP to ChatGPT
Section titled “How to connect AiVikings MCP to ChatGPT”ChatGPT can connect to AiVikings through the Model Context Protocol endpoint at https://mcp.aivikings.ai/mcp. Once connected, ChatGPT can discover AiVikings domain tools, ask you to authorize access, and use those tools to check availability, get pricing, register domains, manage nameservers, and review account domain data.
This guide explains how to add AiVikings as a custom MCP plugin in ChatGPT. It is for builders who want ChatGPT to work with a real MCP domain registrar, instead of moving between chat, API docs, and a registrar dashboard by hand.
Quick answer
Section titled “Quick answer”Use this MCP endpoint when ChatGPT asks for the server URL:
https://mcp.aivikings.ai/mcpAiVikings MCP uses OAuth for authorization. ChatGPT reads the published MCP and OAuth metadata, starts the authorization flow, and then AiVikings asks you to authorize access for your account.
Before you start
Section titled “Before you start”You need these three things:
- An AiVikings account with access to the customer dashboard.
- A ChatGPT account with plugins and developer mode available.
- The AiVikings MCP endpoint:
https://mcp.aivikings.ai/mcp.
If you want to inspect the available tools first, open the AiVikings MCP documentation. If you use Claude instead of ChatGPT, see the Claude MCP connector guide.
1. Copy your AiVikings connection token
Section titled “1. Copy your AiVikings connection token”Open the Connection page in your AiVikings dashboard and copy the customer bearer token. You will use it on the AiVikings authorization page when ChatGPT starts the OAuth flow.
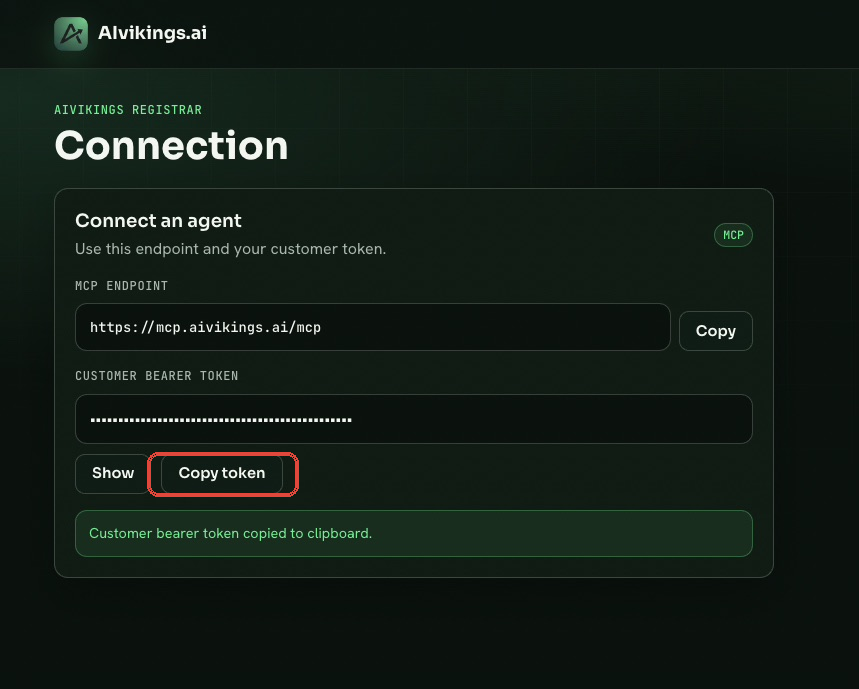
Keep this token private. It is used to approve access for the ChatGPT plugin on your AiVikings account.
2. Turn on developer mode in ChatGPT
Section titled “2. Turn on developer mode in ChatGPT”Custom MCP plugins are available when developer mode is on. In ChatGPT, open Settings, then Security and login, and switch Developer mode on.
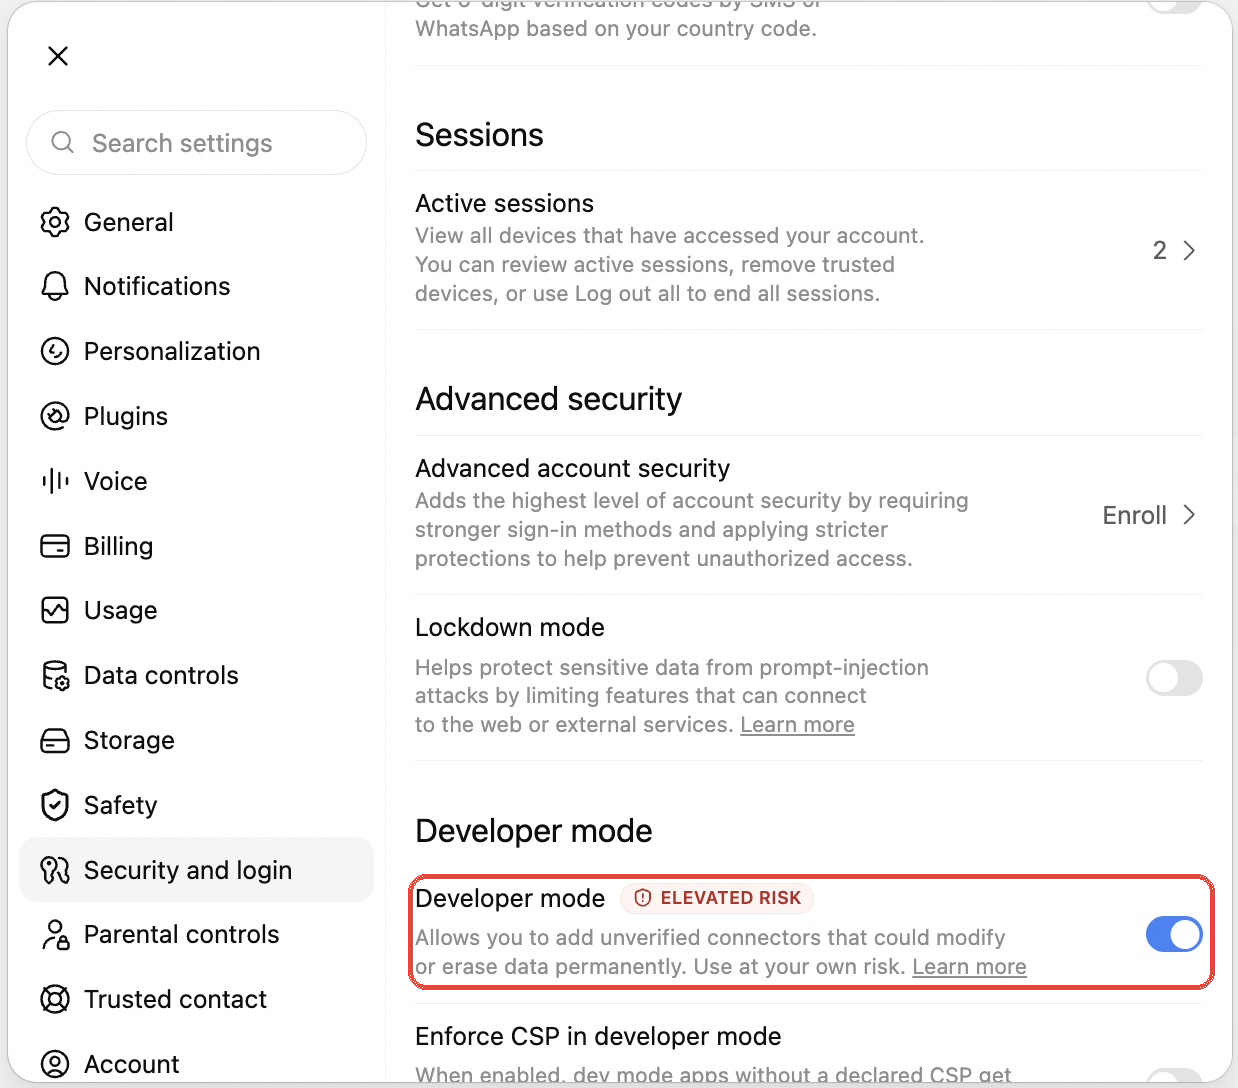
Developer mode lets you add custom connectors that are not selected from the built-in plugin directory. Only add MCP servers you trust.
3. Open Plugins and add a new plugin
Section titled “3. Open Plugins and add a new plugin”Go to Settings, then Plugins, and open the plugins page. Click the plus button in the top right to create a new plugin.
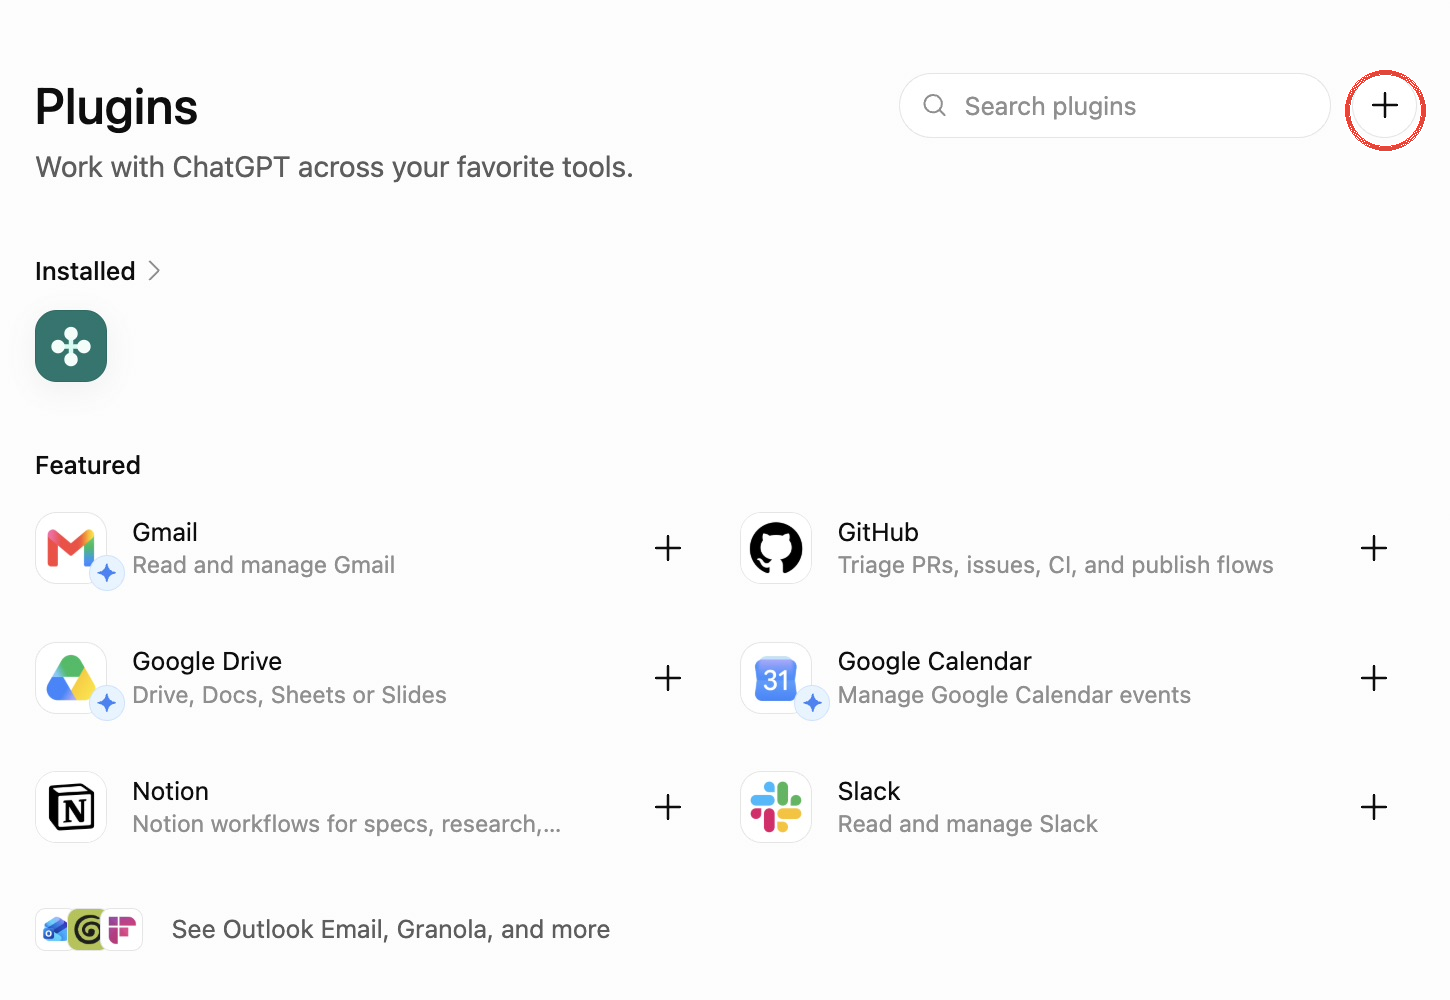
ChatGPT connects to AiVikings from OpenAI’s cloud, so you do not need a local tunnel or local MCP bridge.
4. Enter the plugin name and server URL
Section titled “4. Enter the plugin name and server URL”In the New Plugin dialog, give it a name you recognize, for example AiVikings MCP. Leave Connection set to Server URL and paste this endpoint:
https://mcp.aivikings.ai/mcpIcon and description are optional.
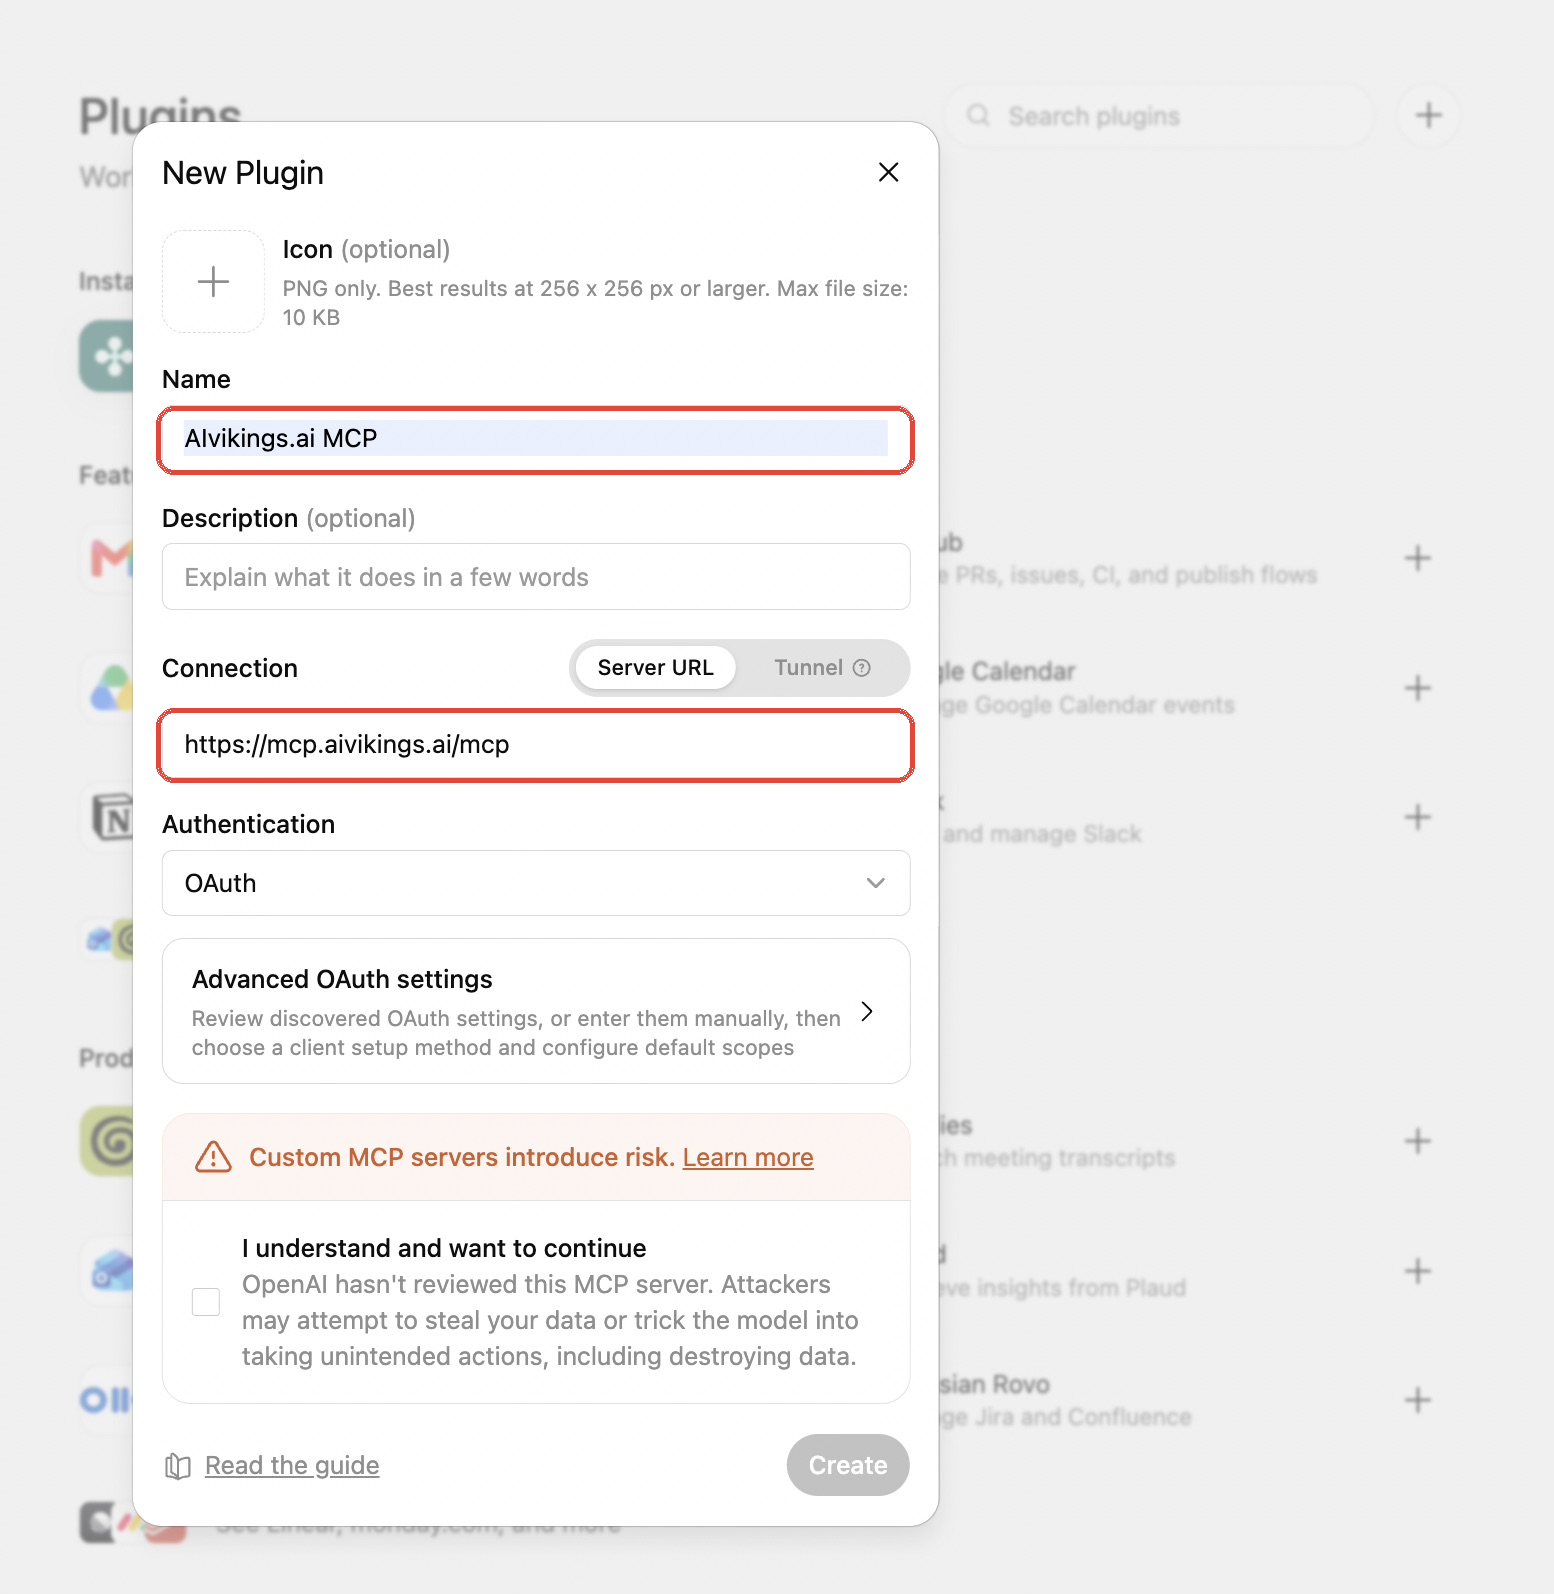
The plugin name is just the label you will see in ChatGPT. The server URL must match the AiVikings MCP endpoint exactly.
5. Set authentication to OAuth and create the plugin
Section titled “5. Set authentication to OAuth and create the plugin”Set Authentication to OAuth. You do not need to open Advanced OAuth settings because ChatGPT should discover the relevant metadata from the AiVikings server. Tick the custom-server acknowledgement, then click Create.
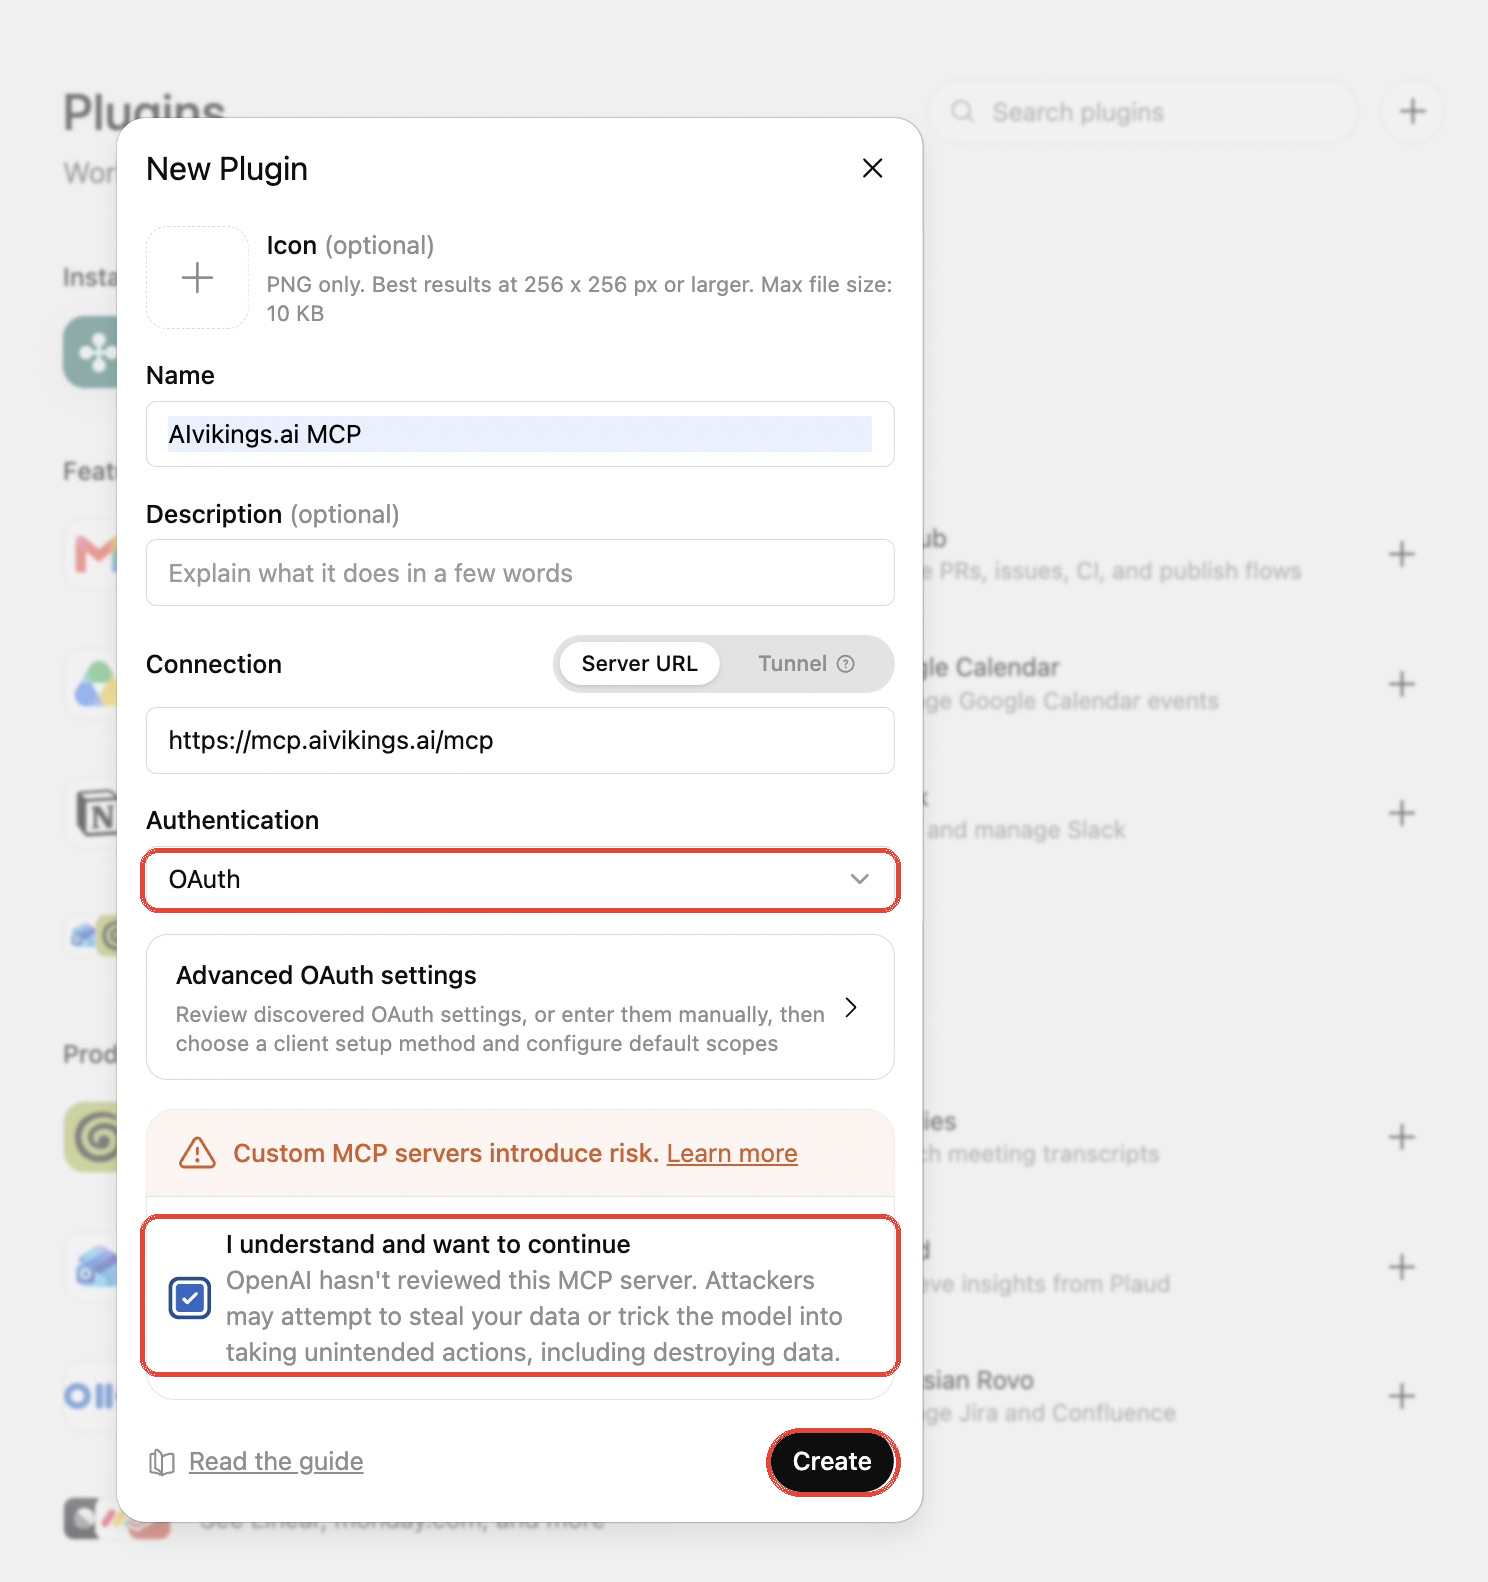
OAuth is what lets ChatGPT request permission without asking you to paste static API keys into the plugin configuration.
6. Sign in with AiVikings
Section titled “6. Sign in with AiVikings”ChatGPT now shows a confirmation screen for the AiVikings MCP plugin. Click Sign in with AiVikings MCP to start authorization.
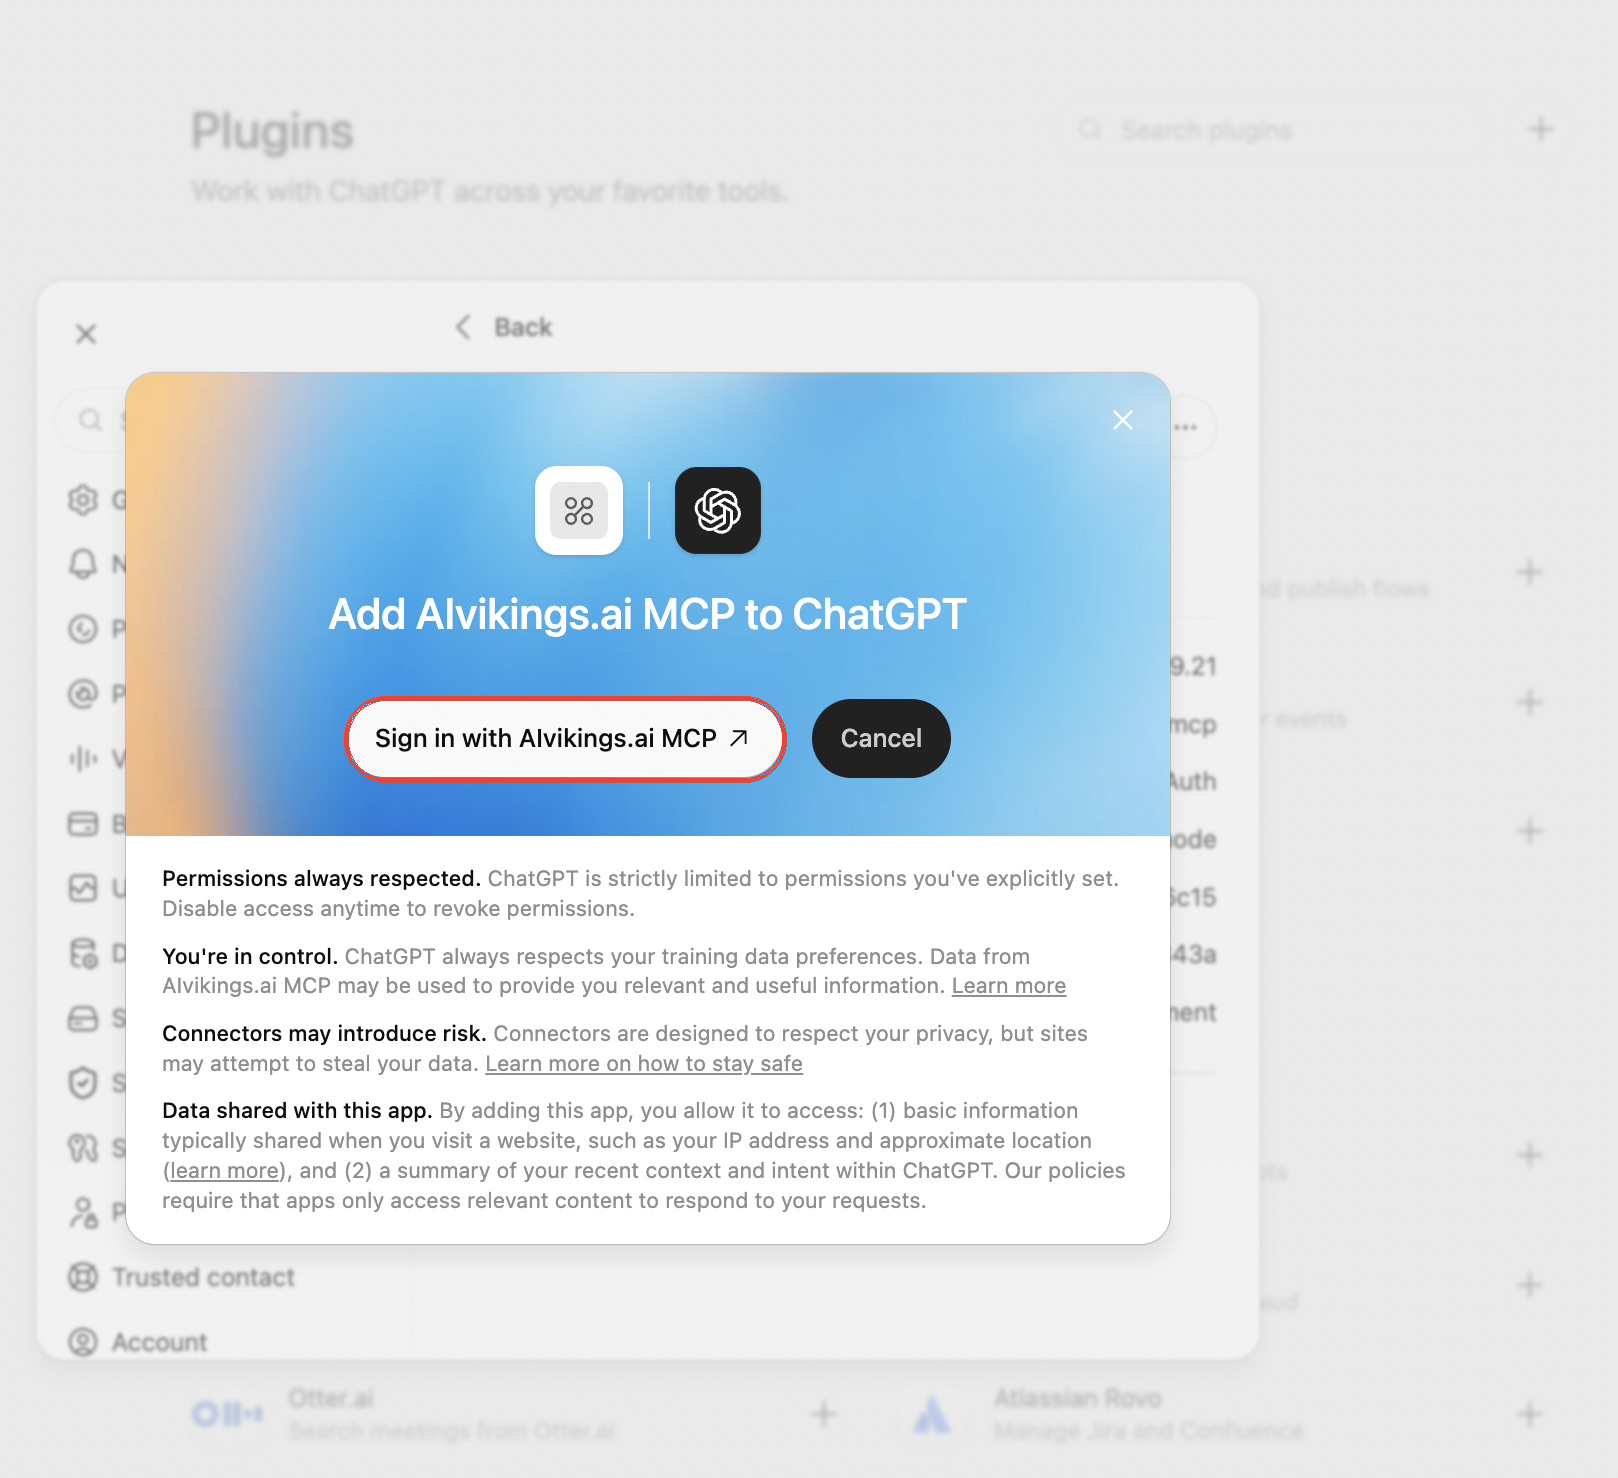
This begins the connection flow between ChatGPT, the AiVikings MCP server, and your AiVikings account.
7. Authorize the plugin in AiVikings
Section titled “7. Authorize the plugin in AiVikings”The AiVikings authorization page opens and lists the access being requested. Paste your customer bearer token from the Connection page and click Authorize.
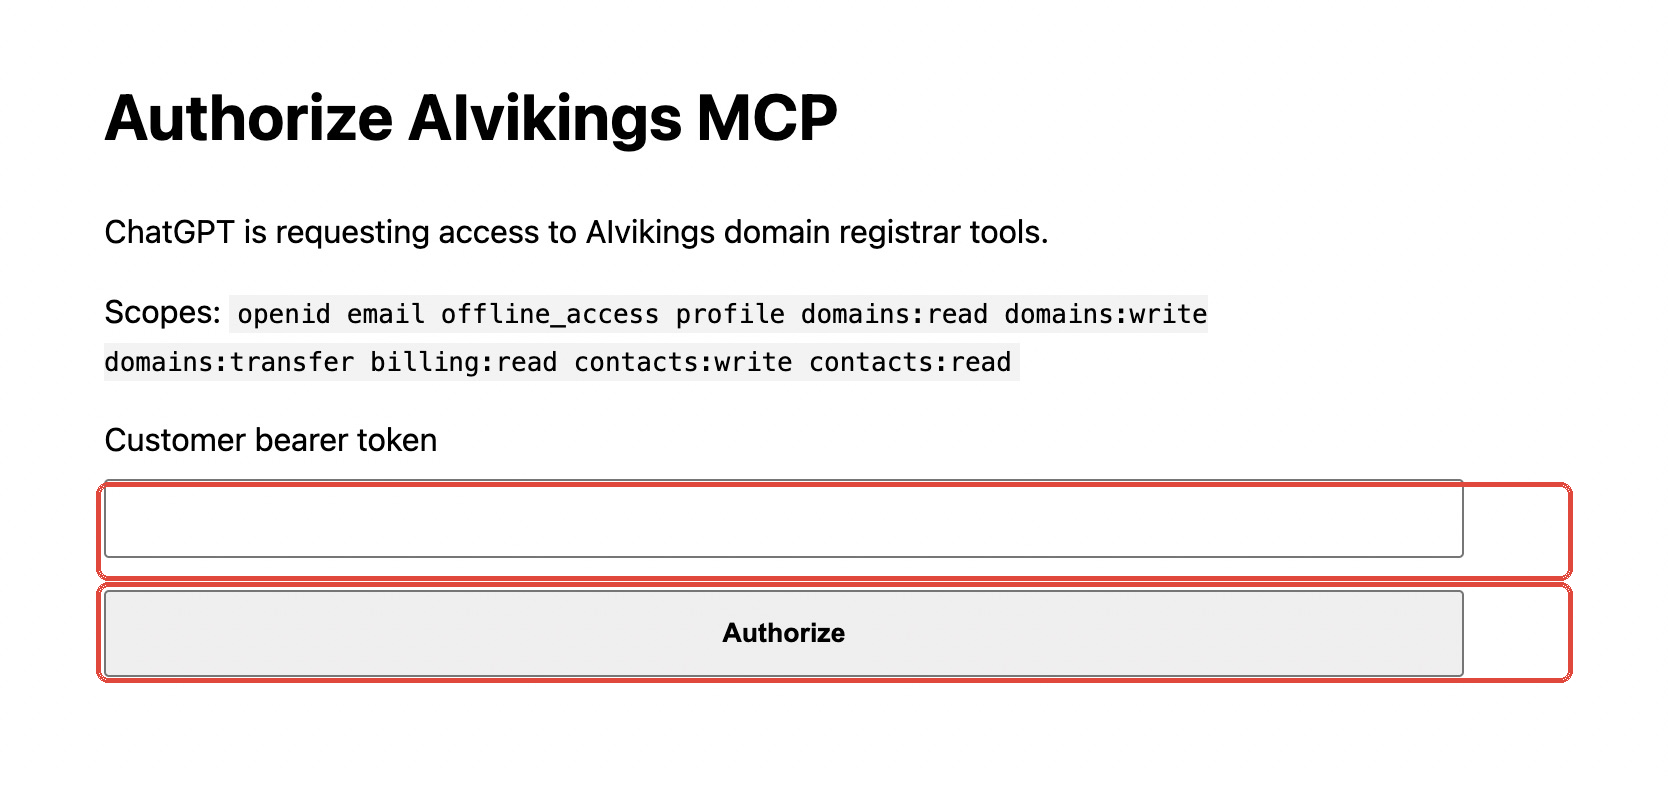
The important part is that you are approving access to your own AiVikings account before ChatGPT can call protected domain tools.
8. Check the connection and permissions
Section titled “8. Check the connection and permissions”Back in ChatGPT, open the AiVikings MCP plugin detail page. Confirm that it shows a connected account and the server URL https://mcp.aivikings.ai/mcp.
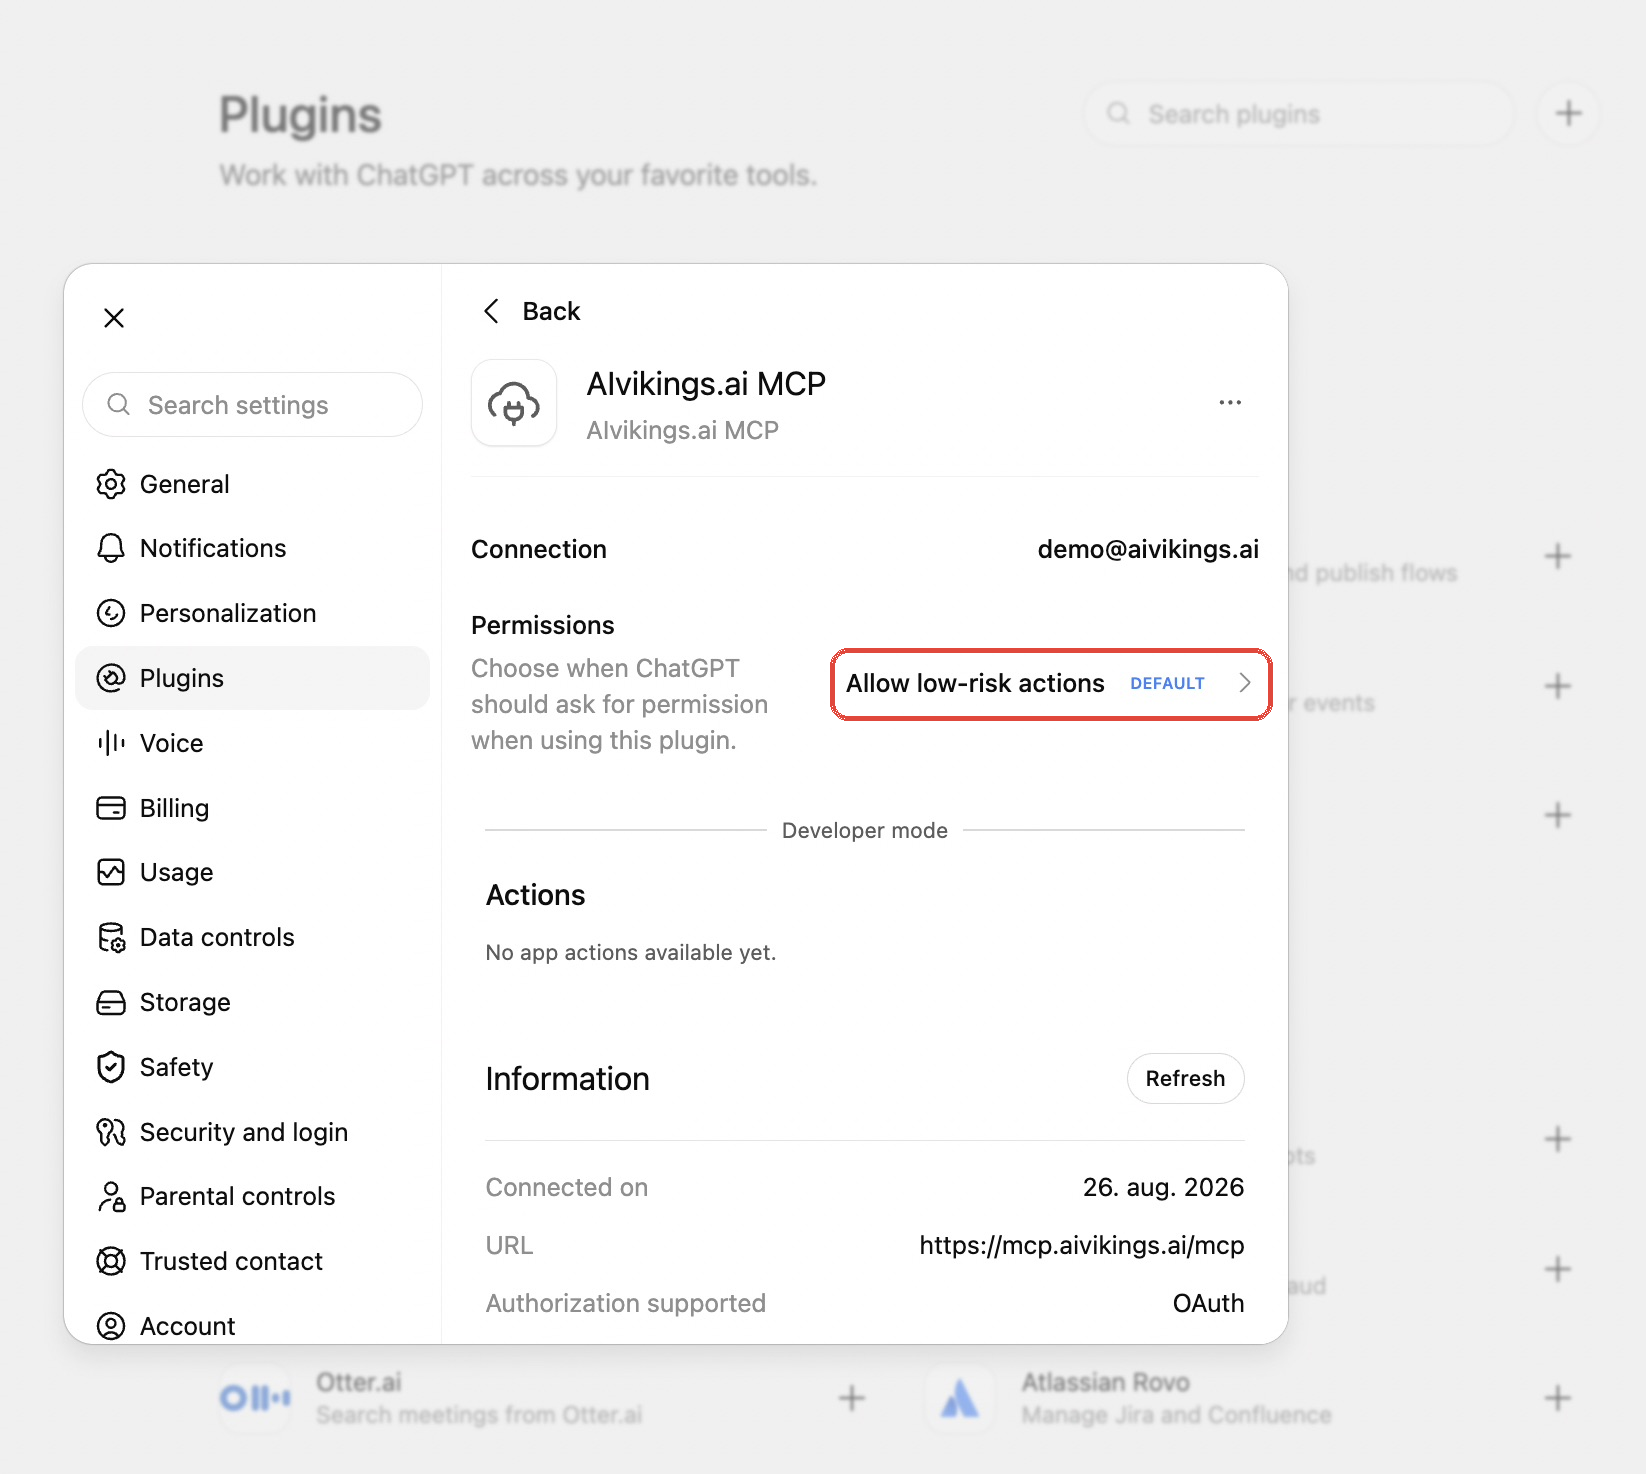
Use permissions to decide when ChatGPT should ask before using the plugin. A practical setup is to allow read-only actions like availability checks and pricing, while keeping registration, transfer, renewal, and nameserver changes on confirmation. Those actions can affect real domains or account credit.
9. Test the connection with a real request
Section titled “9. Test the connection with a real request”Open a ChatGPT conversation, enable the AiVikings plugin if needed, and ask a domain question in plain language.
Try one of these examples:
Is a domain like my-agent-project.icu available?Find available .icu domains for a small pricing tracker agent.List the domains in my AiVikings account.If ChatGPT has permission to use the relevant tool, it should call AiVikings MCP instead of asking you to check manually.
Troubleshooting
Section titled “Troubleshooting”If you cannot add the plugin, confirm developer mode is enabled under Security and login.
If ChatGPT cannot reach the server, confirm the URL is exactly https://mcp.aivikings.ai/mcp with no trailing space.
If authorization fails, copy a fresh token from the AiVikings Connection page, then remove and re-add the plugin.
If no actions appear, open the plugin detail page and refresh the server tools.
If your ChatGPT workspace is managed by an organization, an owner or admin may need to allow custom plugins first.